Sunday, September 27, 2009

Frame 8: Changing Assumptions

Three human shadows, one with their Holga, captured in the forest.I've been wanting to write about the assumptions we inevitably make any time we encounter a new situation or a new person, but I didn't think I had a very compelling story. Just describing how easily some of my own assumptions about this project have been shattered seemed trite or self-serving. I wanted to wrestle with the idea that it sometimes seems to take something different to get us out of our comfort zones, so we can finally see with a new perspective.


Texture of ducks, light, and leaves on a pond.I was thinking about behavioral traits -- assumptions, for example -- and how they originally stemmed from our primitive ancestors' needs to survive and succeed.

The ability to make an assessment of her environment in response to an experience probably helped my neanderthal ancestor find the foods that were nutritious and avoid hazards like sinkholes and crevasses. The better she could discern friend from foe and safe plant from toxic, the more chance her genes had to pass on to the next generation.


Susan sees the sky through the tips of the forest. Here it's the verticality of the tree trunks. Genetic evolution is very slow, occurring over millions of years with an occasional accidental spurt. By contrast, the evolution of our society moves quickly -- perhaps at a break-neck pace.

The way we talk, how we organize ourselves in groups, the approaches we make to decisions, what political parties we belong to and so forth, are plastic and can change many times within a single generation. (Because these changes occur so quickly scientists might even wonder what elements of social behavior have primitive importance or influence the behavior of subsequent generations.)

Shadows of photographer and helper are captured along with a light gremlin from inside the camera. In any case, the fact that we can make assumptions in the face of an event has a strong genetic basis. What I'm interested in is the fact that we can change our assumptions. So often it is in response to an interesting experience. But do we require such an experience to get us out of our comfort zone, or can we imagine a new perspective much like a good chess player works out several moves in advance?

This must be part of the creative process. But how to think from different perspectives? This I leave for you to decide.Ducks on a pond along with a shaft of sunlight. It's a good thing that assumptions can be changed. If my assumption was that a person who was blind could not see, I would be wrong. That assumption wouldn't change my own fate, but it would certainly hinder the progress of our society as a whole.

Monday, September 14, 2009

Frame 7: Process

Rachel poses in a vine maple -- with lens flareWhen I reached my last day in the darkroom for the quarter, I realized I wouldn't be able to print all of Susan's negatives. This was frustrating and a little depressing. The design of the project revolved around the physicality -- what Susan describes as kinesthesia -- of working with old-fashioned manual photo processes.

One long-term goal for this project is to take the physical prints and augment them with a medium that will allow them to be touched. To be experienced by feeling them. No prints; no augmentation, I thought at first. But then I realized something about problem-solving that leads me to this post.

When I was younger, my peers and I were encouraged to pursue degrees in the sciences. My secret ambition was to be an artist, but I didn't give myself permission to study art. Instead, I studied zoology, which probably put me closer to a study of beauty than I would have imagined.
Looking at the sky through the tips of the trees in a forest.
I learned to appreciate the broken regularity of nature, the harmonious cycles of life, the delicate interplay of animal societies. A frog egg spontaneously grows and divides, cells multiplying in mathematical progression and taking shape ordained by the distribution of yolk (heavier yolk leading to larger cells on the bottom and lighter yolk becoming smaller cells on the top.) The fibonacci whorls of a nautilus shell, the strength of a delicate spider web, and how the location of arteries and veins in a duck's foot conserve body heat are all examples of a beautiful and perfect design inherent in nature.

With science and nature, what is beautiful is what has evolved. Beauty is what we get after millennia of interplay between subject and environment, with sometimes breathtaking coincidences or accidents of nature causing great leaps forward. Life is beautiful because it is.

What is art?

There's a hint of a cabin in the woods, dappled with light.Many think of art as showing us what is beautiful, and perhaps what is transcendental and moving. Outside of that, art is a language that can be accessed by anyone.

I used to think that in order to be an artist, you needed to be born clever with a paintbrush or having an innate sense of color. That you couldn't study art unless you were innately an artist already.

These days, I believe that anyone can be an artist, because art in itself involves a process. You start with an idea, or an itch, a wish to communicate, or a wish to learn, and in this manner, conceiving art is just like plunging into science.

The idea is sketched in miniature form. Perhaps many ideas are sketched, or many permutations of one idea, or even just different parts of an idea. As the artist worries and massages their idea, it begins to take on life -- as this piece is moved over here, and that little dot goes up there, putting a great opening over this way, and so on.

The idea might be sketched in a larger format, or painted, sketched with colored pencil, or built from paper or cardboard or clay. Anything to prototype it and to get closer to the skin, and under the skin -- to better understand how the full-size piece will be.
A lone tree-top, vignetted with light leaks.
When starting out, the piece invariably begins by looking bloody and ugly. It can feel painful to work with it, laborious, toilsome. It takes work to work with it. Little by little as the life of the artist is breathed into the piece, it takes on life of its own. As the artist plays with it, adds structure and dimension, the piece begins to depart from the original idea and take on something from the processing and that is when it becomes the art form.

Just like a scientist solving problems under the microscope -- patiently creating just the right environment for her bacteria to multiply, so too is the artist solving problems and, more often, making the best of each situation. If this trick doesn't work, then let's go this other route. If we can't afford this, then let's try doing that instead.

Well. If we can't print all of the prints right now, then let's scan the contact sheets and put the digital images up on the Web. Let's create a blog!
Just this one change -- creating a blog -- has altered the dynamics of our project immensely. We have begun to learn from one another, and to learn from hearing from you. Texture of vine maples reaching towards the sky in the forest.

As it turns out -- here's where an artist speaks as a zoologist: the social interaction becomes part of the art project.

Life is art. Art is a process.

Life is also a process.

Thanks for listening,

Tess

Monday, September 7, 2009

Frame 6: "How I Frame ... Life On the Infinity Setting"

Circular stairway creeps into the corner, with texture of patterned carpet.
It is true most everyone believes that when one is blind they reside in darkness.

Perhaps some who are blind do, but most friends I know do not. For me I always see the light -- pardon the pun ....

There are days the whirling of the snow like whiteness is such a glare that it is as if someone is shining thousands of white particulate like mini flashlights into my eyeballs. Ouch! Even when I try to close my eyes to sleep they persist.

I digress.... The light can be helpful to me if it is not too bright and overwhelming. This is why taking photos earlier in the day and before the sun sets is better for me -- or on a cloudy day. It is okay for me when there is a bright sunny day if pollution or glare is minimal as well. It just all depends.

Bright Shasta daisy, dianthus, and Gaillardia counter garden bricks, hydrangea leaves and other shapes.
Pictures from three to six feet are easiest for me to frame or figure out. It is also easier if I know the area in which I take photos. My gardens -- I have many -- I know intimately. Each plant, old stump, vine, rock, planter and little garden accessory I have placed or planted around something nature has drawn me to. People are easy to place and pose; they generally are patient and will stay where you put them...unless they are naughty and playing me. But if they make noise or giggle I can tell they have moved and they know they have been busted!
Huge, solarized heads of hydrangea macrophylla droop in the sunlight.
What I find more challenging with the camera is that the viewfinder -- a useless necessity for me -- is on the extreme left of the top of the camera. It is therefore a challenge for me to keep the cameral level sometimes when clicking the shutter lever. "If" the viewfinder was dead center in the middle of the camera -- where I believe it logically should be -- it would be easier for me kinesthetically to hold the camera straight when I shoot. Especially this is true when I shoot photos at the infinity setting.

Recently I spent time in Montana, in Lincoln at my brother's spacious property and house. There is a valley with foothills to the Rockies the side of the house faces. I wanted to catch that scene over the little pines growing in their acreage .... I got verbal description, tried very ardently to hold the camera straight, held my breath and snapped the shutter. I took three photos as I wasn't quite sure how my shots would turn out.

Inez posing by a garden bed while windchimes reflect a ghostly sunlight - trim end of film
I also, when we were leaving, wanted a shot or two of my brother Jeff and his wife, my sissy, Sharon on their front porch veranda waving and holding each other. It was from a great distance as I wanted to have others see the greatness of the house, the prairie and the mountains. I had Jeff talk to me so I could find them and got the tiniest bit of audio description of the scene. I wanted an angle picture but I did not want the camera to tilt.... It was very hard, I admit, and I was not confident of the shot at all so I took two. Infinity -- long photo -- shots are the most difficult for me.

When I frame the close shots I can feel the subject, what is around the subject and if I am unsure I can check it out again if I feel my kinesthetics are off. I have much more confidence in this genre.

Nellie's pale fur is solarized and on fire, transforming her into an ephemeral apparition out on the deck. Tess is the key to me learning from what shots I take. Our partnership is evolving and I do learn from her every time we have the opportunity to review the work I have done. I have a great deal of respect for the feedback she gives me. It is extremely helpful. My husband anxiously awaits the time he can actually view the prints. Though Bjorn has been with me for over two decades and knows I am capable in many fields, he is having a difficult time understanding my desire to photograph with this particular camera and with the b/w film that he thinks is too difficult to load. I keep telling him, "Wait until you see the photos." He says, "I'm waiting .... When?"

More luxurious hydreangea heads and leaves, dappled with light.
Ah, skeptics! To be fair, Bjorn is more curious than he is a skeptic. And I am thinking probably those who read the blog may be as well. All I know is though I am a very busy professional and busy at home as well, there is something pleasurable about the images I build in my head and the opportunities I make with the camera when those ideas in my head and those images come together in a photograph.

For now ...

Susan - and Inez

Thursday, September 3, 2009

Frame 5: When the Left Hand Wants to Know What the Right Hand is Doing (and Other Dilemmas)

Flowers in a birdbath (formerly a washbasin), with shados of Susan and Inez.After printing contact sheets for the first rolls of film Susan had shot, I had my first dilemma.

During the summer the academic schedule is short (only seven weeks), meaning the darkroom was open on a limited schedule. There was no hope of enlarging all the images during summer quarter. I would have to choose a couple from each roll and wait until the next quarter to make any additional prints.

Was it up to me to decide which images would be printed? I am sighted, so I would be making judment based on what I myself interpreted to be interesting and/or thought-provoking. It seemed to me this unfairly edited what Susan had begun, but I could see no way around it. I think each photographer always has a few shots in a roll that they really bond with emotionally during the shoot. If I could find these shots, I might be on the right track.

A lily on the deck, flowerpot on a curled metal base. With limited time, I also elected not to print on archival quality paper. I instead used RC paper, the thickly-coated, not-so-attractive resinous paper used more for speed of processing.

This was disappointing, not only from the standpoint of print quality (as fiber paper produces a much richer and more textured image), but from the process itself. While each step takes much longer than RC paper, it is quite a pleasant process, an artistic process. The paper is optically more sensitive and allows less room for clumsiness. In addition to being expensive, it is also thick and fragile. One must pay critical attention to the paper facing, exposure times, filters, times in chemicals and in washing, handling with tongs, rinsing, and be aware of dry-down (the factor by which the image darkens as the paper dries).

On the other hand, working with RC paper had a distinct advantage. It is bulletproof and has a much better chance of surviving over-development, tonging, scratches, and the like. When lab hours are shorter, the darkroom is packed every minute and becomes kind of a pressure cooker. The medium you print with can be a determinant of success ....

Feverish students slam their prints from tank to tank, tonging the prints, flipping them over in their hurry to find their own, and contaminating tanks by insufficiently draining prints while moving them. A fiber print in this environment needs weaponized babysitting. With 14 enlarging stations in the larger of the darkrooms, the room almost bounces with energy -- especially on days when someone tunes the boom box to trash-talk radio. A day spent guarding fiber prints can leave an artist wondering what part of art they were just experiencing.

A lone lily on the deck next to the wooden railing with other potted flowers scattered around.As a social experiment, the classroom darkroom is the only place I've encountered where so much time is spent in baloney contests. A young man, waiting for his prints to process, will state an outrageous opinion of some obscure fact. A second will throw down another inflated opinion, and the aggressiveness of his assertion will either lead to the first person throwing in additional information or to his backing down in awe of the new arrival's mastery of his subject. And it can keep going. The best way to avoid all this is to walk away, except that in the darkroom, the timing of the prints keeps us all captive -- which might be the point. We're the audience. (You can always tell a seasoned photographer: they're the ones wearing headphones.)

Inez lying in the shade, with an artifact of light subracting some of the film.As I went through the print process, I realized I had another decision to make: should I use standard filtering and composing methods to improve on the negatives, to bring out the theoretical best in each print? I decided this would be a mis-representation of "theoretical best" and how the subjects came together into their composition.

When I looked at Susan's film, I could see a pleasant happenstance of composition. Susan was composing each of her shots with considerable thought and care, and with a great attention to detail. But in addition to the composed subject matter it was obvious Susan was attracting some happy circumstances to each photo. It could be the velvet touch of the sun on a leaf, or the fact that Nellie was walking out of the frame when the photo was taken, making for a sweet gesture. In each photo there was something that was a "happening" -- an attraction, if you will -- that had the touch of the divine.

In the end, I used filters to bring out the texture of each shot, but I did not correct across the print for areas of exposure. This, I thought, was an artifact of shooting by feel and it should definitely be part of the resulting image.

This project was to be all about the printed image, but in the end, I realized that I could scan the contact sheets and post digitally the images I was not able to print during this first time in the darkroom.

That posed an entirely new set of dilemmas....

Friday, August 28, 2009

Frame 4: "Texture"

Inez by the kitchen door, with shadows of leaves and part of a tub of flowers. Light leaking around the edges. Texture became extremely important to me as I lost my sight. I'm sure sighted people relate to texture in their own way, but to me texture is a very sensual thing. Touch is how I explore what things are; the richer the textures the better. Textures create for me interesting patterns. I love adjoining them with one another to complete a tapestry of sorts where nature is concerned especially. I am sure that textures must be pleasing visually but touching the textures is far more enjoyable I think.

For instance: even dirt has texture. When it has settled down and packed into itself it seems dull and rather lifeless. When you take the little hand spade and turn the dirt over to expose its rich texture and make it all airy and velvety and froth it up so the plants look more green in it and happy .... Well, there you have wonderful texture that breathes and exudes a new look that is fresh and feels so lovely between the fingers. It makes for better photos too.

My friends tell me that it is fun to go with me when I want to shop. They laugh when I pick the most expensive garments from the racks. I tell them it's my ability to feel good, quality texture. Try it. Wear a blindfold and feel the fabrics of the clothing on a big circular rack sometime. If you have a sensitive touch you will be able to tell which of the fabrics are quality fabrics. It's not that difficult.

Closeup of a rose, with gravel, grass and leaves in the background. So, too, in nature one can develop an eye or "feel" for what texture can do for a photo. Gardens lend themselves well to these kind of rich shots. Some I have taken of different kinds of flowers, some in pots surrounded by spikey iris by a stump next to a clearing with gravel and an old craggy fence have been great texture-filled photos which lent themselves well to black and white stills. At least they were fun to shoot and fun to take as I felt where to point the camera!

Don't underestimate the role texture plays. Coupled with the right light -- and that wouldn't be the glaring, bright light of a hot summer day, the end result can be stunning ... if the camera, patience and a steady hand persist.

Signing Off For Now!

Susan Gjolmesli and Inez

Friday, August 21, 2009

Frame 3: "What I've Learned About Light"

Hint of a cabin in the forest with shafts of sunlight touching the groundWhen I first met with Tess I really had no idea why she wanted to talk to me. As she unraveled her concept my inner self was very difficult to contain. The creative juices were "boinging" all over the place as it were. My husband can tell you that if I am left to ponder for 45 minutes it can be "dangerous", as in his world it usually translates to "work"! In mine, it's a fun project which ends up to be aesthetically pleasing -- a work of art, usually in wood, or in nature in one of my many gardens.

When Tess asked if I knew of anyone who would like to participate in a photography experiment of this kind who was blind or visually impaired -- I rather selfishly said -- "how about me?" Truly, I was so happy she said "yes!"

She modified the camera and that was helpful, especially for the distance settings. The others were helpful but my memory is good and there aren't too many others to keep straight. The camera does rather feel like a child's toy but I am learning to respect it more and more. The first time I tried loading the film though I was a wreck! I have small fingers and they are sensitive, have a light touch and are very adept. But they felt -- well -- untrained and stiff and like they were all thumbs. But after having loaded several rolls of film I am quite good at it and certainly I am much faster now!

I still stress about winding the film and getting the number correctly. I have no vision really and I want so to be measured and precise -- am I a perfectionist? Well, in some things, yes. I have had to loosen up where this camera is concerned, though.

I find shooting inanimate things is easy -- or a person and inanimate things. My Seeing Eye Dog is a good poser and she truly understands the concept of having her picture taken. She will stay in a pose (remarkable!) until the shutter clicks! Then she runs around in a gleeful dance as if to say "Oh, I did so well! Look at me, I'm sooo pretty!" Inez is the perfect model that way. My other dog, Nellie --hmmm, not so much. It is a struggle and to try to capture them together --impossible.

Tess asked me why I was drawn to the project . I told her that though I am blind I still have a "visual" context. I was a designer in past years. Even as a visually impaired person I went to floral design school in Denver and graduated top in the class. This was after the school owner told me on the first day "People like you don't belong in this business." I stood there at the time with my white cane and thought, "I'll show you, lady." And I endured the first two weeks of torture to emerge victorious.

I know therefore about balance, texture, depth, and most of all I have learned about light. Color I know too but that is a dimension I need not worry about in this artistic form.

Light is all I have left where "sight" is concerned. It can be a friend or a fiend. The glare often, depending on the day and the atmospheric conditions, can be excruciatingly painful for me. Or, in the soft morning light of early morning, or in the golden hues of evening as the sun bids us adieu, it is tender with its touch. That is my favorite time to capture the images, as I know the gold must bathe each object richly with exquisitely different light. Finding the unexpected within the hopefully expected image is like opening a present.

My next lesson is to learn how to hold the shutter open longer... And to possibly use a small tripod. That, I think, may prove difficult in the beginning as I like to be in control (ah, a revealing statement!) and hold the camera myself.

Until next time this is your photographer at large and her faithful Seeing eye Dog...

Susan Gjolmesli and Inez

Thursday, August 20, 2009

Frame 2: 120 Film

View of a contact sheet, in which negatives are exposed directly in their negative sleeves, without enlarging
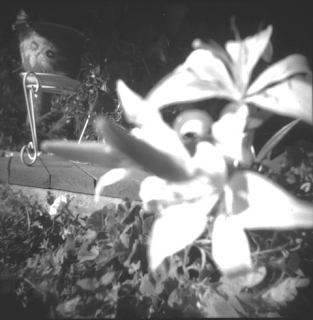
The black and white film we used for the Holga, a 120 sized film, comes on a plastic spool about 2" wide. I decided to use Kodak for this project; not only is it less expensive than other brands, the film itself feels thicker and has more friction, making it a little easier both to load into the camera and also load onto a developing reel. We used standard 400 speed film, which is pretty good for covering most lighting situations, and has the advantage of being compatible with the chemical processes used in the college darkroom lab.

With film in the camera, any time the shutter is opened, light will enter the camera and expose the film lying against the inside of the camera back. This image is about 2" wide (the approximate width of the film) by 2" high. The film is manufactured to hold 12 such images, but there are things one can do to vary this. Rolling film only partway, for example, will single-expose a 2" swatch and double-expose a swatch matching how far one rolled the film. You can shoot entire rolls like this; they come out looking a little "artistic", as the exposure is different across the real estate of the film, but I've had some really good results with this method and enjoy shooting this way.

Since Holgas are cheap, people modify them to hold 35mm film (exposing a bigger swatch of the film than one normally is used to), or two rolls of 35mm film one above the other. Or you can shoot a roll of 35mm on the lower half of the roll and then re-shoot it on the upper half of the roll. The possibilities for really wild uses of film are endless.

For 120 film, a plastic frame can be clipped into the camera, allowing you to expose less than the 2" wide swatch.

In my opinion, the best use of 120 film is the square exposure that is approximately 2" by 2" (or 6 x 6 centimeters, as 120 implies). I find these proportions very graceful. The negative is large and the image crisp (one hopes). It is far easier to work with a grain focuser and I am generally enlarging to a lesser degree than I would enlarge a 35mm negative. When printing onto, say, 8 x 10" paper the image occupies a nice position with landscape orientation. The balance created by the white margin gives a pleasant weight.

With a Holga, the image is captured so that the floor or horizon of the subject runs parallel to the edge of the film. This makes handling of the negatives straightforward; they face you directly when you lay them out in negative sleeves or in a negative carrier for the enlarger. I mention this because my Mamiya C3 (an old-fashioned portrait photographer's twin lens camera) and other such cameras capture the subject with the floor or horizon of the image running perpendicular to the edge of the film. Since the image faces run lengthwise, this makes for more steps in handling them when working with them. So there was yet another reason for using the Holga with 120 film.

When shooting with 120 film, it rolls off of its plastic spool and onto another spool. When done shooting, you remove both the film (rolled onto the takeup spool) and the original but now empty film spool. You can recycle the original spool over to become the take-up spool for the next roll of film.

The film is removed from the camera without letting it spring open to expose everything you took all that time to photograph. There are fiddly bits of paper the size of a cigar band you can moisten and wrap around the roll to hold it secure. I usually put the film into a piece of aluminum foil for security. I might store it in the refrigerator if I can't develop it right away.

The next step is done in the dark, ideally in a film-loading cubicle, which is a light-tight closet except for the barest bit of light one can discern peeking beneath the door. I always lean way over the work table in the closet. In case I drop the film, it hopefully will not fall onto the floor and risk becoming exposed. To develop the film, you release and unwind the roll, separating the film from its backing paper. The bit of tape that held the two together can be folded over the edge of the film. Then the film is inserted into and rolled onto a plastic reel in such a manner that none of the photographic surfaces touch each other. You can imagine an old movie projector, with film rolling from spool to spool. Imagine the spools being made such that there is space between the film surfaces as the film rolls onto the spool. In this way, the 120 film spool can be placed into a developing tank, and with the right agitation during development, all of the film will receive appropriate contact with the developing media.

Another reason for using Kodak film is the size of the film. Because the exposed surface is larger, to me it presents a larger accident waiting to happen. With a more delicate film I worry about introducing wrinkles into the film as I load it onto the developing reel, and about scratching the film. The film is vulnerable in the developing tank when I am agitating the chemicals across the surface, even so, I try to agitate gently. Lastly, other films I've tried require a longer developing time, and over the life of a project this can add to a significant increase in time.

There is a critical time when the film is hanging to dry and it is vulnerable to scratches and to dust. This can be the bane of working with film in a shared or academic environment. On more than one occasion I've come upon a student -- so captivated by an image -- leaning into the drying racks, eagerly flicking the protective curtain this way and that, and more than likely dusting everyone's negatives with fine particles from the curtain (which is intended to be a dust magnet.)

This first batch that Susan shot included 5 rolls of film. For safety's sake, I developed these in three separate batches, each taking a little over an hour. I then hung the negatives to dry for about an hour and a half each.

When the negatives were dry, I cut them into segments to fit into clear plastic negative sleeves. Each roll fits on a page of negative sleeves approximately 3 frames across in four rows of frames.

I had just enough time the first day to print contact sheets for three of the rolls. The remaining two rolls had to wait until the next day I was in the darkroom.

Tuesday, August 18, 2009

Frame 1: Introduction to the Holga

First photo! the reflection of a student walking in the window, with Inez as the dark shape. You're perhaps eager to see the photos. This is, after all, a visual medium we're using.

Please have patience, and experience this project the same way we did, in that there was no instant gratification.

It seems that each step has been slow and meaningful.

First I taught Susan how to load and shoot the camera, and she shot her first photo. Actually, this is her second photo, as during her first shoot, she left the lens cap on.

You might think that loading film is a small task, but the Holga takes 120 film. This comes in a longish spool that must be locked in place on the left side of the camera and then carefully pulled out and caught onto the take-up reel on the right side of the camera. As a sighted person, I match what I see to what I feel to know when the film is at the right spot to close the camera back, and to know when and how to advance the film.

Susan showed a remarkable adeptness and willingness to feed the pesky film into an elusive take-up slot -- all the while talking to and coaxing the camera to do her bidding. We found we counted 'ticks' and 'turns' of the film take-up reel to know where we were.

In shooting with Holga, I often advance the film bit by bit, to overlap images one upon the other. Since Susan had not had this experience, she viewed the film as having discrete segments that needed to be exposed. She expressed anxiety at needing to know exactly where each frame should be.
I initially explained how the film fed out, and attached less importance to the placement of each shot. To give you an idea of how complicated the process is, here is what I had written for Susan in my cheat sheet of instructions:

"Place the newly opened film roll into the left compartment and hold it snug there while pulling out the leader of the film. You’ll need to unfold the very tip of the leader, which has been cut down to about an inch wide. This leader tip of film needs to be captured into the slot on the take-up reel which you put into the right compartment. To do so, while keeping hold of the film in the left compartment pull out the film across the camera until the tip reaches to about the farthest edge of the camera (I think that’s what we measured.) Make sure the tip is unfolded by folding it backwards against itself. Now that the tip is straight, feed it into the slot. Now while holding the film roll AND the film in the slot, start winding the film winder to take up slack in the film. One needs to get the film gripping sufficiently before putting the back of the camera on. 

By my memory, it took 5 ticks of the film winder to take out the slack, and 43 complete turns after that to get to the first frame. I would probably continue to do maybe 4 of the turns before putting the back on to make sure the film is winding properly."

Gee, can you stand on your head at the same time, too? Undoubtedly, this sequence of activities would be daunting to the average person on the street! But sitting there with Susan was quite an experience, as she stepped up to the challenge and conqured the film-loading process.

Then we encountered the problem of how to determine which end of the camera back was "up"! More on this later.

Monday, August 17, 2009

Getting Started

The rangefinder Holga, shot with my phone's camera, as I was modifying it on the kitchen counter. Braille letters, some Velcro(R) and Velcro(R) nibs are in the background.
I chose a Holga for this project because I thought the camera would lend a certain intimacy to the photos and also, more than likely, a dash of "uncertainty" to the process. Plus, I love working with medium format and immediately try to share my enthusiasm with folks who have only experienced 35 mm.

Anyone who has used a Holga knows how temperamental these lightweight plastic cameras can be. While they are cheap and can be toted around like a toy, each one is different -- with its own quirks and (sooner or later) problems.

My Holga has so far demonstrated a pretty good ability to take clear pictures. The back doesn't fall off and the lens usually stays where you set it. The lens appears to be one of the better ones and gives crisp images, or as crisp as a plastic lens can. I still have the lens cap, and the shutter still works. The tripod attachment can get a bit funky, so you don't want to screw it on very hard. But other than occasionally leaking light (making for interesting vignetting), the camera most often does what one tells it to do.
I paid somewhere around $35 for my camera at Glazer's, the Mecca for darkroom photography here in the Pacific Northwest, and have endured No End of Eye-Rolling and Rude Remarks for paying such an exorbitant figure for it. As you well know, artists are ... frugal. They make cameras out of things like cardboard boxes and zucchinis. But at the time I was in a hurry to complete a class project requiring a medium format camera and didn't have time to order a cheaper camera online.

I modified my camera somewhat so that Susan could find the different apertures and determine her focusing distance. I say "the different" apertures, but actually there are only two: f8 (i.e. "Cloudy") and f11 (i.e. "Sunny"). Coming from the factory, these settings have little imprints, one depicting clouds and the other sun.

To make my modifications, I used an extreme version of Velcro(R) which has a very sticky backing -- suitable for using on brick -- and nibs that are stiff and can be felt individually from one another. I worked these with an X-acto knife so the nibs made Braille letters, then cut them out and affixed them to the aperture settings.
For shutter distances, I carved rows of nibs that counted out "1", "2", "3" and "5" settings which represented 1, 2 and 3 meters, and infinity, respectively.
The Holga has two shutter speeds: Normal, which is approximately 1/100th of a second (until the spring is fatigued and either breaks or slows down); and Bulb, which will hold the shutter open as long as the shutter lever is held down. As a side note, Bulb setting is the one I normally use, as I like to shoot in the dark and illuminate my subjects with various kind of lights like flashlight and candlelight. For now, suffice it to say I made labels for these settings as well.
To see a typical Holga, click here.